Wednesday, August 17, 2011

Panang Curry


After I had made my favorite, I thought I should make my husband's favorite Thai dish, Panang Curry. It turned out great. I made my own curry paste, but wasn't happy with it. I had to use the whole paste instead of the said amount in the recipe, which was only 1 tsp. I will try another recipe for the paste so the taste is stronger.

Panang Curry 
Adapted from Keo's Thai Cuisine 
Chicken Breast, cut in small pieces, 2 
Oil, 1/4 C 
Garlic paste, 2 tsp 
Musamun Curry Paste, 2 tsp 
Kaffir Lime Leaves, julienned, 6 
Coconut milk, 2 C Palm Sugar, 2 T 
Fish Sauce, 2T 
Peanut Butter, 1/4 C 
Thai eggplant, 2 C 
Potato, 1, chopped 
Sweet Basil, julienned, for garnish 
Lime, 1, for garnish 
Peanuts, chopped, 1/4 C 

Heat oil then add garlic paste and curry paste. When the paste bubbles, add the chicken, kaffir lime leaves, coconut milk, palm sugar, and peanut butter. Stir well and cook for 3 minutes. Add the eggplant and potato, cook until the meat and vegetables are halfway cooked, then add the peas. Cook the curry until all ingredients are cooked through and the oil separates from the curry. Garnish with sweet basil and serve with steamed rice. 

Monday, August 15, 2011

Singapore Satay Sandwiches


Last night I made one of Kashef's favorite dishes. It's a great dish because it makes a lot and you can always freeze the extra chicken mixture. I used whole grain rolls from Trader Joe's this time which Kashef liked a lot more. You can serve some vegetables with it to make a complete meal.


Singapore Satay Sandwiches

  • 6 Servings
  • Prep/Total Time: 30 min.

Ingredients

  • 1-1/2 pounds boneless skinless chicken breasts
  • 1 teaspoon steak seasoning
  • 1 tablespoon canola oil
  • 3 tablespoons reduced-fat chunky peanut butter
  • 1/4 cup unsweetened apple juice
  • 2 tablespoons lime juice
  • 2 tablespoons reduced-sodium soy sauce
  • 2 teaspoons hot pepper sauce
  • 6 kaiser rolls, split
  • 2 cups torn romaine
  • 1 cup shredded carrots
  • 1/2 cup julienned peeled cucumber
  • 6 tablespoons unsweetened crushed pineapple

Directions

  • Sprinkle chicken on both sides with steak seasoning. In a large skillet, cook chicken in oil for 4-7 minutes on each side or until juices run clear. Transfer to a cutting board and shred.
  • In a large microwave-safe bowl, melt peanut butter. Whisk in the apple juice, lime juice, soy sauce and hot pepper sauce. Add chicken and toss to coat.
  • Spoon 1/2 cup chicken mixture onto roll bottoms; top with romaine, carrots, cucumber and pineapple. Replace roll tops. Yield: 6 servings.

Editor's Note: This recipe was tested with McCormick’s Montreal Steak Seasoning. Look for it in the spice aisle.

Recipe Link: http://www.tasteofhome.com/Recipes/Singapore-Satay-Sandwiches

Friday, August 12, 2011

Drunken Noodles....and My First Steps into the World of Thai Cuisine!!!


Other than Pakistani comfort foods, Thai food is my favorite. Wherever I move (I've been doing that a lot lately) my first task is to find a good Thai restaurant. I have to say that no restaurant has even come close to the one in my hometown, Sacramento. Bangkok Garden in Sacramento has the most delicious food I've ever tasted. My second favorite is in D.C., Pasara. Unfortunately, my new home, Richmond, VA has failed me with three Thai restaurants in the past month and half! Since Richmond is a less diverse place than the other cities I've lived in, I've come to the conclusion that I'm not going to find anything better than I've tasted already (reviews on yelp say the same thing). So I decided to try and make my favorite Thai dishes at home. This way I can control the salt and fat content and can have dishes like Drunken Noodles more often.

Thai cooking scared me. I had tried my hand at this cuisine before and though the food I had cooked smelled just like the ones at restaurants, they tasted horrible. I was a new cook and a bit naive. I went and bought and array of 'Thai Kitchen' products thinking they were authentic. I later realized that Thai Kitchen is a brand targeting people that aren't Thai food savvy. So, when I tried cooking Thai food again, I did a lot of research about the recipes and ingredients. I got a Thai cookbook and also looked at recipes online. I was surprised to find a Thai grocery store in Richmond and did all my shopping there, making sure all ingredients were authentic.

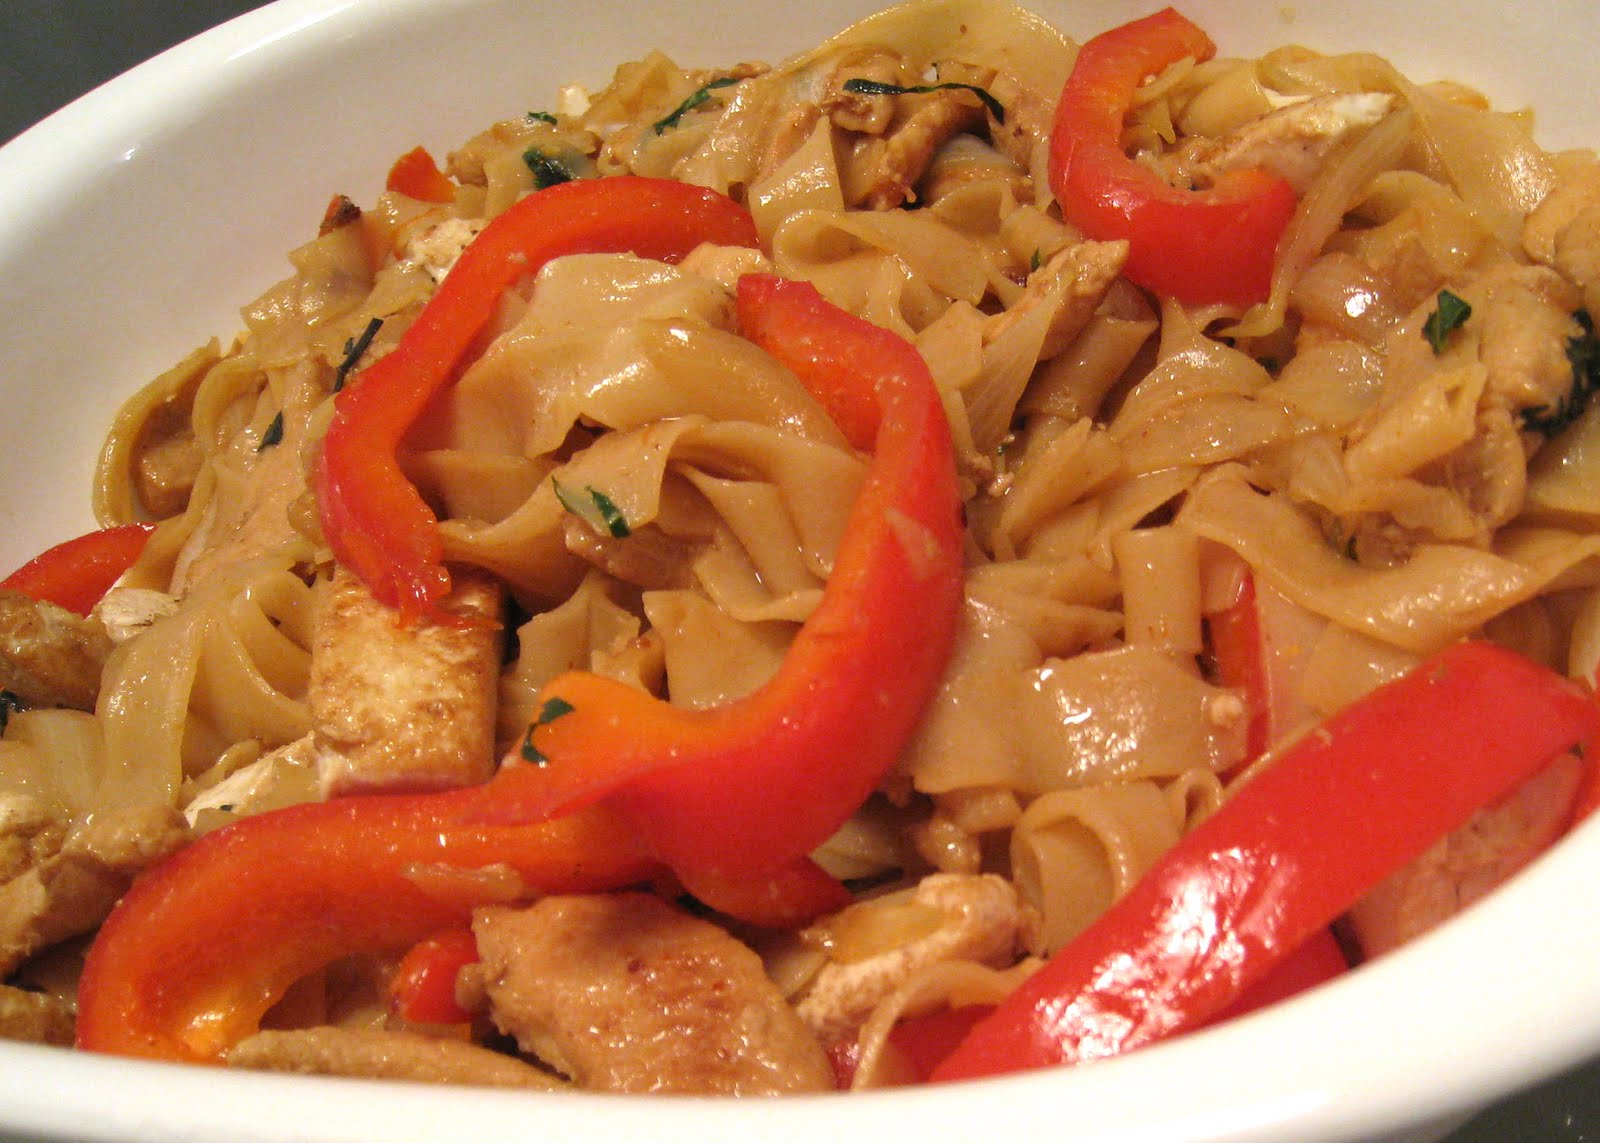
I made my favorite dish, Drunken Noodles yesterday, but sometimes my brain doesn't work when I fast so I messed up the recipe. I halved the amount of noodles, as the recipes made enough to feed six people, which is way too much for me. However, I did not half the recipe for the sauce. The resulting dish tasted authentic and delicious but was really salty. Today, I made it again, fixing my previous mistake and the result was a delicious, restaurant quality dish.

Drunken Noodles
Adapted from www.importfood.com

Serves 4

Ingredients:
1/2 pkg Wide Rice Noodles
1 C Tofu, fried (optional)
2 Chicken Breasts, cut in strips
1 Red Bell Pepper, cut in strips
1/2 Onion, cut in long slices
1 C Sweet Basil
1 1/2 tsp Garlic paste
1 Thai Red Chili, chopped
2 T Fish Sauce
1 T Black Soy Sauce
1 T Palm Sugar 
Crushed Dried Thai Chilies, as needed
Oil, as needed

Soak the rice noodles in water until soft, about 10-15 minutes. In a deep pan, or a wok if you have one, heat oil and stir fry the noodles. Take the noodles out into a dish and run them through cold water so they don't stick together (you may need to separate the noodles with your hands), set aside.

In a pan, heat oil, then add garlic paste and red chilies, stir for about a minute. Add the chicken and let cook. When the chicken is cooked on the outside and is no longer pink, add the bell peppers. Now add the ingredients for the sauce: fish sauce, Golden Mountain sauce, black soy sauce, and palm sugar. Let cook until the chicken is cooked through. Add the onions and cook until the onions are crispy but cooked. Toss in the noodles, tofu, and sweet basil. Sprinkle crushed dried Thai chilies to achieve desired level of spiciness. Drunken Noodles is ready for you to enjoy!

Toblerone "Mousse"


I work until 7pm almost every night then have to commute home so I don't get home until around 8. This doesn't leave me much time to cook anything fancy. This recipe is awesome because it taste gourmet but has only two ingredients :) 

RECIPE:

8 triangles (about 2-1/2 oz.) TOBLERONE Swiss Milk Chocolate with Honey and Almond Nougat
1-1/2 cups  thawed COOL WHIP Whipped Topping

make it

MICROWAVE chocolate in medium microwaveable bowl on HIGH 1 min. or until melted. Cool 1 min.
ADD whipped topping; stir with wire whisk until well blended.
REFRIGERATE at least 5 min. Garnish with fresh berries and mint leaves, if desired.


You can use different types of candy bars if you aren't a big fan of Toblerone. The best part was the crunchy toffee that was mixed with the creamy mousse. 

Enjoy! 

http://www.kraftrecipes.com/recipes/easy-toblerone-chocolate-mousse-63571.aspx


Parmesan-Garlic Chicken Recipe


Raw meat scares me. I am a new cook so yes, raw meat scares me :).  I was quite proud of this meal because I faced my fears and cooked with  raw meat! This is a super yummy and simple recipe. I changed it up a bit to make it spicier and it was a hit with the husband!

PARMESAN-GARLIC CHICKEN

1/2 cup KRAFT Grated Parmesan Cheese
1 env.  GOOD SEASONS Italian Dressing Mix
1/2 tsp. garlic powder
6 small  boneless skinless chicken breast halves (1-1/2 lb.)
1 tsp of crushed red pepper 

make it
HEAT oven to 400°F.
MIX cheese, dressing mix and garlic powder.
MOISTEN chicken with water; coat with cheese mixture. Place in single layer in shallow baking dish.
BAKE 20 to 25 min. or until chicken is done (165°F).

I broiled it when it was done cooking to make it golden brown. I actually made this in my toaster oven :) Super easy and really yummy! 

Enjoy 


http://www.kraftrecipes.com/recipes/easy-parmesan-garlic-chicken-51155.aspx


Lasagna

Unfortunately I did not take a picture of the lasagna when it was done but it was really delicious! To make things easier I will just divide the recipe into the layers that are needed in the lasagna.


Things that will be needed for layering:
  • Lasagna Pasta
  • Mozzarella (shredded and sliced for the top)
  • Parmesan
  • Ground Beef (recipe below)
  • Tomato Sauce (recipe below)
  • Ricotta filling (recipe below)


Sauce Recipe

Prego Sauce
Garlic/ginger paste
Basil leaves
Thyme
Lemon
Black pepper
Salt

Add in all of the ingredients and cook. Keep in mind that the meat is going to be added into the sauce so you want to make sure that the sauce is slightly more than the meat.


Ground Beef Recipe

Ground beef
Tomato
Onion
Garlic/ ginger paste
Oil
Garam masala
Red chilli powder
Salt

In heated oil add onion garlic/ ginger paste. Then add in the beef and the spices. Then add in the tomato. Cook and then when it is cooked add the meat into the tomato sauce. Then this layer is complete.


Ricotta Filling

1 egg
15 oz ricotta cheese
1/2 cup shredded mozzarella cheese
Black pepper
Salt

In a bowl mix the ricotta cheese, mozzarella, black pepper, egg, and salt. This mixture is done.


Now, in the dish you are going to use to bake the lasagna in add 1/3 of the sauce/meat mixture. Then add the pasta layer. After that comes the ricotta cheese layer, but before moving onto the next layer sprinkle parmesan cheese on the ricotta cheese layer. After this layer is complete continue layering (sauce, pasta, ricotta, parm, pasta etc.) However when you get to your last layer of ricotta instead of layering pasta again just finish off with the meat sauce and then top with slices of mozzarella cheese.

Heat the oven to 475 degrees for 45 mins. If the mozzarella does not brown a little- change your oven setting to broil so that you get a nice looking dish!

Braided Bread with Filling

I really like this recipe mainly because its quick, looks impressive, and its really easy and versatile, Once you know the basics of this recipe you can substitute in things and dont have to follow the recipe precisely.


Dough

package active dry or fresh yeast

1 teaspoon maple syrup or honey

1 cup warm water

3 cups all-purpose flour

1 teaspoon salt

1 tablespoon extra-virgin olive oil (or regular oil)

(Let the dough sit for a while and let the yeast rise.)

*

I did 2 different fillings just to try different things both of them were a hit. You can play around with this.

Chicken Filling

Spicy Jack Daniels barbecue sauce (or any)

Mozzarella cheese

Chicken (cooked cubes)

Fresh cilantro

Red onion

Just mix the chicken and sauce into a bowl. Then after placing the chicken mixture onto the middle of the dough, add in the shredded mozzarella cheese, red onions and cilantro. Then thats it! Wait for it to bake. It takes around 25- 30 mins at 400 degrees. You can apply an egg wash on the bread if you wish, I did not. I used Pam's olive oil spray (after taking the picture). You could also leave it as is and it looks like good bread!

*

Fish Filling

Caramelized onion

Fish (cooked cubes)

Bihari Kabob Shan Masala

Water

Lemon

Tomatoes

Caramelize one onion. Then keep that aside. Get some uncooked tilapia cut into cubes. Heat up the saucepan, add some oil and let the fish cook. Then add some bihari kabob mix, eyeball it. Add in a little water and lemon. Let that cook. When you turn the heat off the fish should not be watery but it should have some thick sauce sticking to it. Place this mixture onto the dough. Then add in the caramelized onions to the mixture. Then to finish cut slices of a tomato and place those slices on top of the fish mixture and caramelized mixture.

*

After you roll out your dough and are happy with the looks of it place it onto some foil or baking sheet. Make sure whatever you use is sprayed with oil. Then, cut even slits on both sides of the filling with a knife. Starting at one end, fold alternating strips at an angle across filling. (The filling should be in the center of the dough)

Then that’s it! Wait for it to bake. It takes around 25- 30 mins at 400 degrees. You can apply an egg wash on the bread if you wish… I didn’t. I used Pam's olive oil spray (after taking the picture). You could also leave it as is and it looks like good bread!